Gatortrax Tonneau Cover Installation
Installing a Gatortrax Tonneau cover on your truck bed is a stellar way to protect your cargo from the elements and enhance the aesthetic appeal of your vehicle. Below, find a detailed step-by-step guide to help navigate through the installation process of this top-quality Tonneau cover.
Required Tools
Before getting started, gather all the necessary tools:
- Socket wrench
- Measuring tape
- Rubber mallet (optional)
- Flat-head screwdriver
Check Components
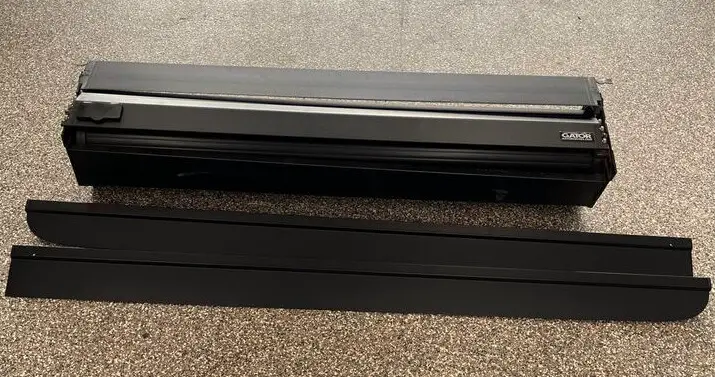
Unbox your new Gatortrax Tonneau cover and check all components against the product manual to ensure you have all the required parts. Generally, you should have:
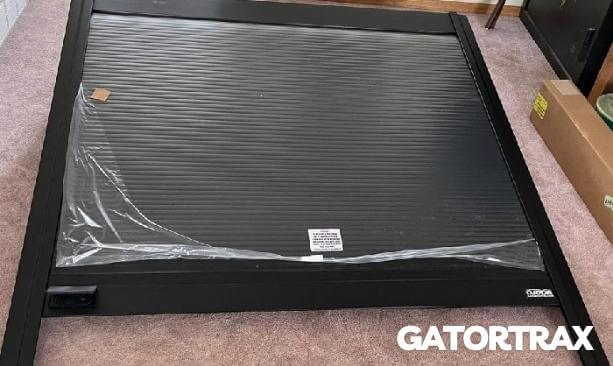
- The Tonneau cover (often pre-assembled in the cassette)
- Side rails
- Clamps
- Bolts and nuts
- Rubber seals (if not pre-installed)
Preparing the Truck Bed
Clean your truck bed thoroughly and ensure no debris or residual material might interfere with the installation.
Install Side Rails
- Place the side rails on each side of the truck bed, ensuring that they are perfectly aligned with the bed’s edges.
- Using clamps, temporarily secure the rails in place.
- Check the alignment of the rails with a measuring tape to ensure they are equidistant from the sides of the bed along the entire length.
- Once properly aligned, use a socket wrench to tighten the clamps securely.
Installing the Gatortrax Cover
- Gently place the Gatortrax cover cassette at the head of the truck bed, ensuring the rubber seal is facing down and is in contact with the bed to provide a watertight seal.
- Align the holes in the cassette with the holes on the side rails.
- Secure the cassette to the rails using provided bolts and nuts, and tighten them with a socket wrench.
Unroll the Cover
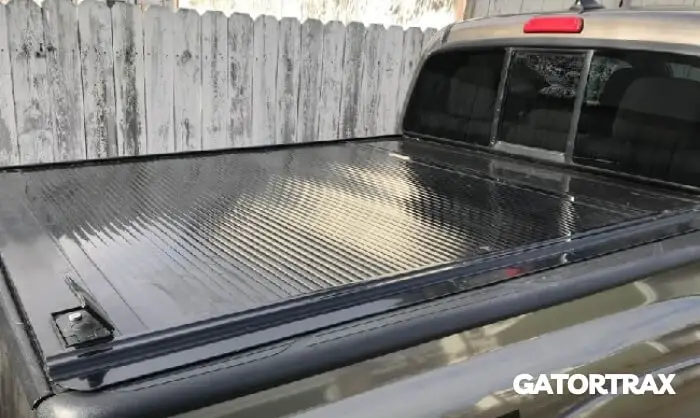
- Slowly pull the Tonneau cover towards the tailgate, ensuring it glides smoothly along the side rails.
- Once fully extended, check the alignment and ensure that the cover sits flush against all edges of the truck bed.
Adjust and Test
- Make any necessary adjustments to ensure that the cover operates smoothly.
- Test the locking mechanism to ensure it securely latches and releases.
- Roll the cover back and forth several times to verify smooth operation and check for any misalignments or adjustments needed.
Attaching the Drain Tubes (if applicable)
Some Gatortrax models come with drain tubes to channel water away from the truck bed:
- Locate the drain holes in the side rails or cassette.
- Attach the drain tubes to the holes and route them to a suitable drainage point beneath the vehicle, ensuring they are not kinked or bent to allow free flow of water.
Final Check
- Perform a final check of all bolts and clamps to ensure everything is securely fastened.
- Ensure the cover is sealing correctly along all edges and adjust if necessary.
Maintenance Guide
- Keep the tracks and moving parts clean to ensure smooth operation.
- Regularly inspect the rubber seals and replace them if they start to wear out or degrade.
- Periodically check the tightness of all bolts and clamps to avoid any looseness over time.
Conclusion
Installing a Gatortrax Tonneau cover involves meticulous attention to detail and adherence to the installation guide to ensure optimal functionality and longevity. This addition to your truck amplifies its aesthetic appeal and offers a secure and protected environment for your cargo.
Once installed, maintaining the cover through regular checks and minor adjustments will guarantee that it will serve you effectively for years. Refer to your product manual for specific guidelines pertinent to your Gatortrax model. Feel free to reach out to the manufacturer or a professional installer if you encounter any challenges during installation.

Mark Takahashi, Car parts guru with a passion for mechanics. Blogger extraordinaire, translating auto jargon into everyday magic. Drive into his world of knowledge!